
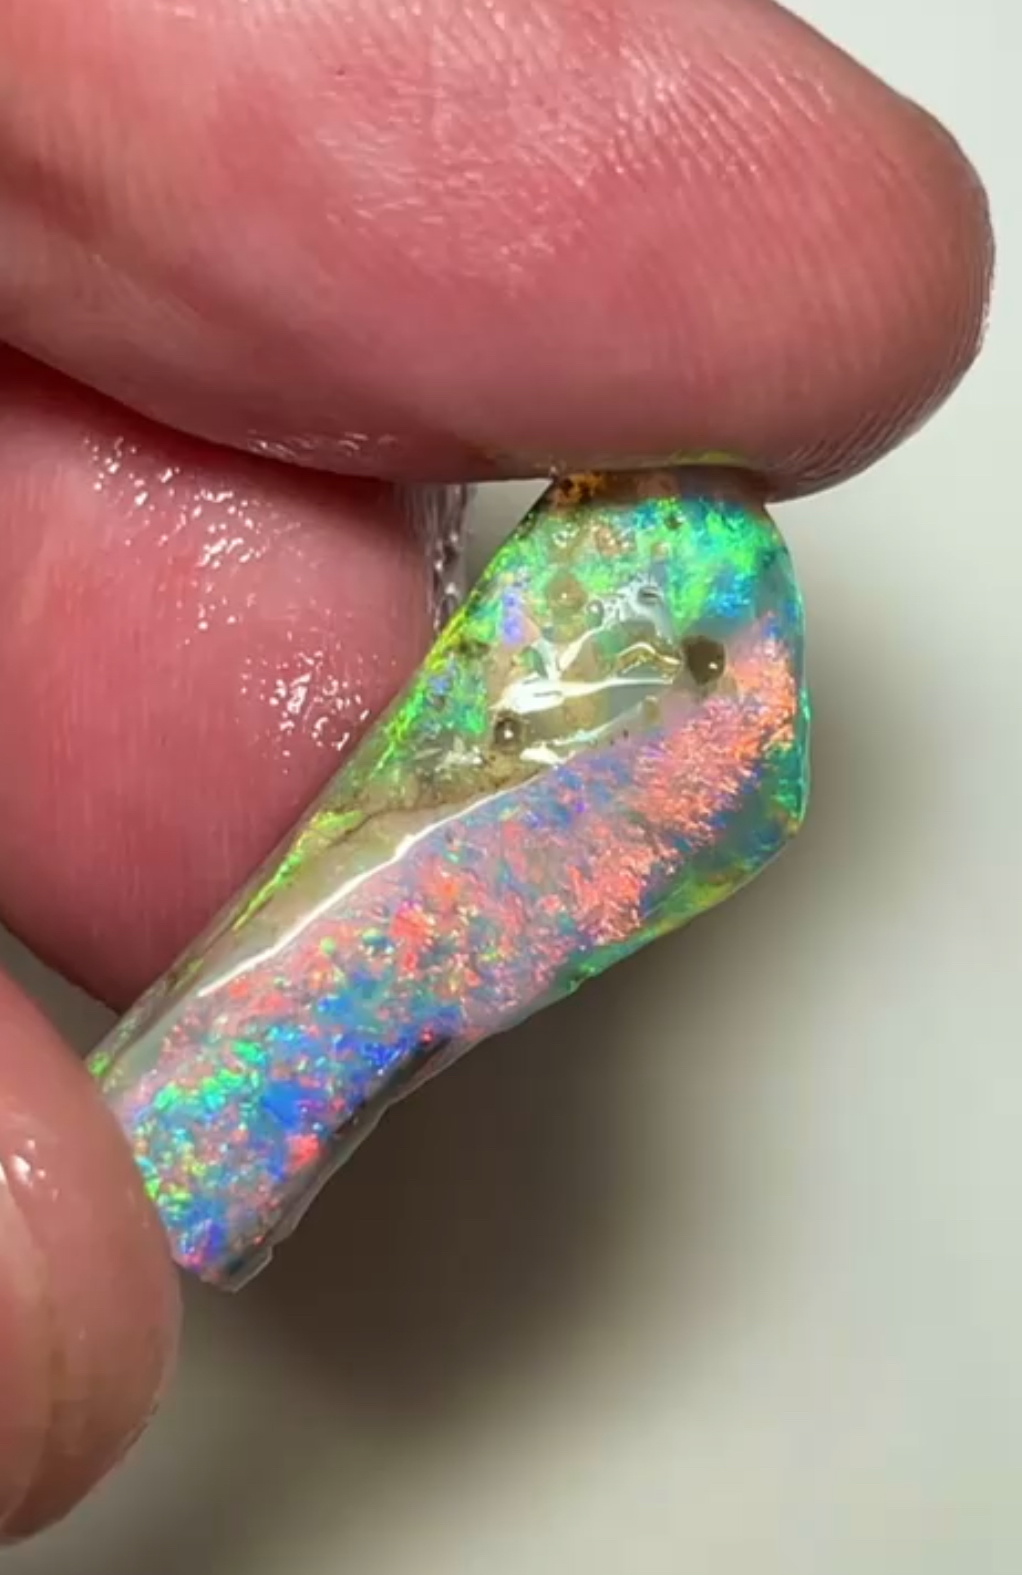
The transformation of an opal Crude polished stone requires several steps. Each one gradually reveals its color, shape and light play.
Transform a Rough Opal does not simply remove material until a smooth stone is obtained. Every crude is different.
It is necessary to observe its structure, identify the colour and identify any defects. These observations then allow us to choose the best way to work the stone.
From the observation of the crude to the final control, let's discover the main steps to pass a Rough Opal one Polished Opal.
1. Observe Rough Opal before you start
Before using a saw or diamond wheel, the stone must be carefully observed.
Several elements may provide guidance on the work to be done. We can search la position of the color bar and its apparent thickness.
It is also necessary to spot the potch, sand, cashing rock and any cracks. The observation also allows to search the angle which presents the play of colour Most interesting.
Wetting the stone can make it easier to observe its surface and colours.
This first analysis helps to choose the direction of the future stone. It also avoids unnecessary removal of an interesting part of the crude.
However, Rough Opal does not always immediately reveal what it contains. Some defects or coloured areas appear only as work progresses.
2. Choosing the direction of the future opal
After the observation comes the choice of orientation.
In particular, it is necessary to determine which part will become the main face of the Polished Opal. This decision plays an important role in the final outcome.
Indeed, the play of colour can change considerably depending on the angle of observation.
Therefore, the objective is not necessarily to keep the maximum weight. Sometimes removing more material makes it possible to get a more interesting face.
The thickness and position of the colour bar also play an important role. A very fine bar usually requires more caution than a thicker coloured area.
A good orientation can considerably transform the final appearance of the opal.
3. Remove unnecessary parts of the crude
Work can now begin with the gradual withdrawal of parts that will not be retained.
Depending on the opal, it is possible to remove from cashing rock, sand or some potch areas. Other parts may also interfere with the operation of the interesting area.
The potch is not a sterile rock. It's about Common Opal which has no play of colour.
It is not always necessary to remove the entire potch. Depending on the structure of the opal, the lapidary may retain a portion of it under the coloured area.
This first reduction in crude can lead to significant weight loss. Thus, the initial weight alone does not allow for the future polished stone.
The main aim is to gradually move closer to the interesting part without unnecessarily removing material.
Depending on the crude, the lapidary can make some cuts with a diamond saw. He then continued the work on a suitable wheel.
4. Grossing and preform
Grossing allows the superfluous material to be phased out. It also begins to reveal the future form of the opal.
This stage sometimes holds surprises.
A crack may appear during the roughing and may require a review of the original project. Conversely, a nice color zone can lead to a slight change in the intended orientation.
The lapidary then begins the preform. It gradually gives the stone its general silhouette: oval, round, drop or free form.
At this stage, there is still some work to be done. The aim is therefore not to obtain the final form immediately.
This step mainly prepares the stone for the more precise work that will follow.
5. Choose the shape according to the opal
The structure of the crude strongly influences the final shape of the stone.
Oval shapes and curved cabochons are common, but they are not an absolute rule.
One free form, or freeform, can sometimes better respect the natural structure of the crude. It can also preserve a beautiful color zone or avoid a defect.
Some opals may also have a less curved profile. In other cases, the arrangement of the color will directly guide the shape.
Want to get at any cost a perfect oval can make lose a lot of material Interesting.
The choice must therefore seek a balance between colour, proportion, stability and reasonable weight retention.
During the transformation of an opal, we must first adapt to the stone rather than impose a form on it.
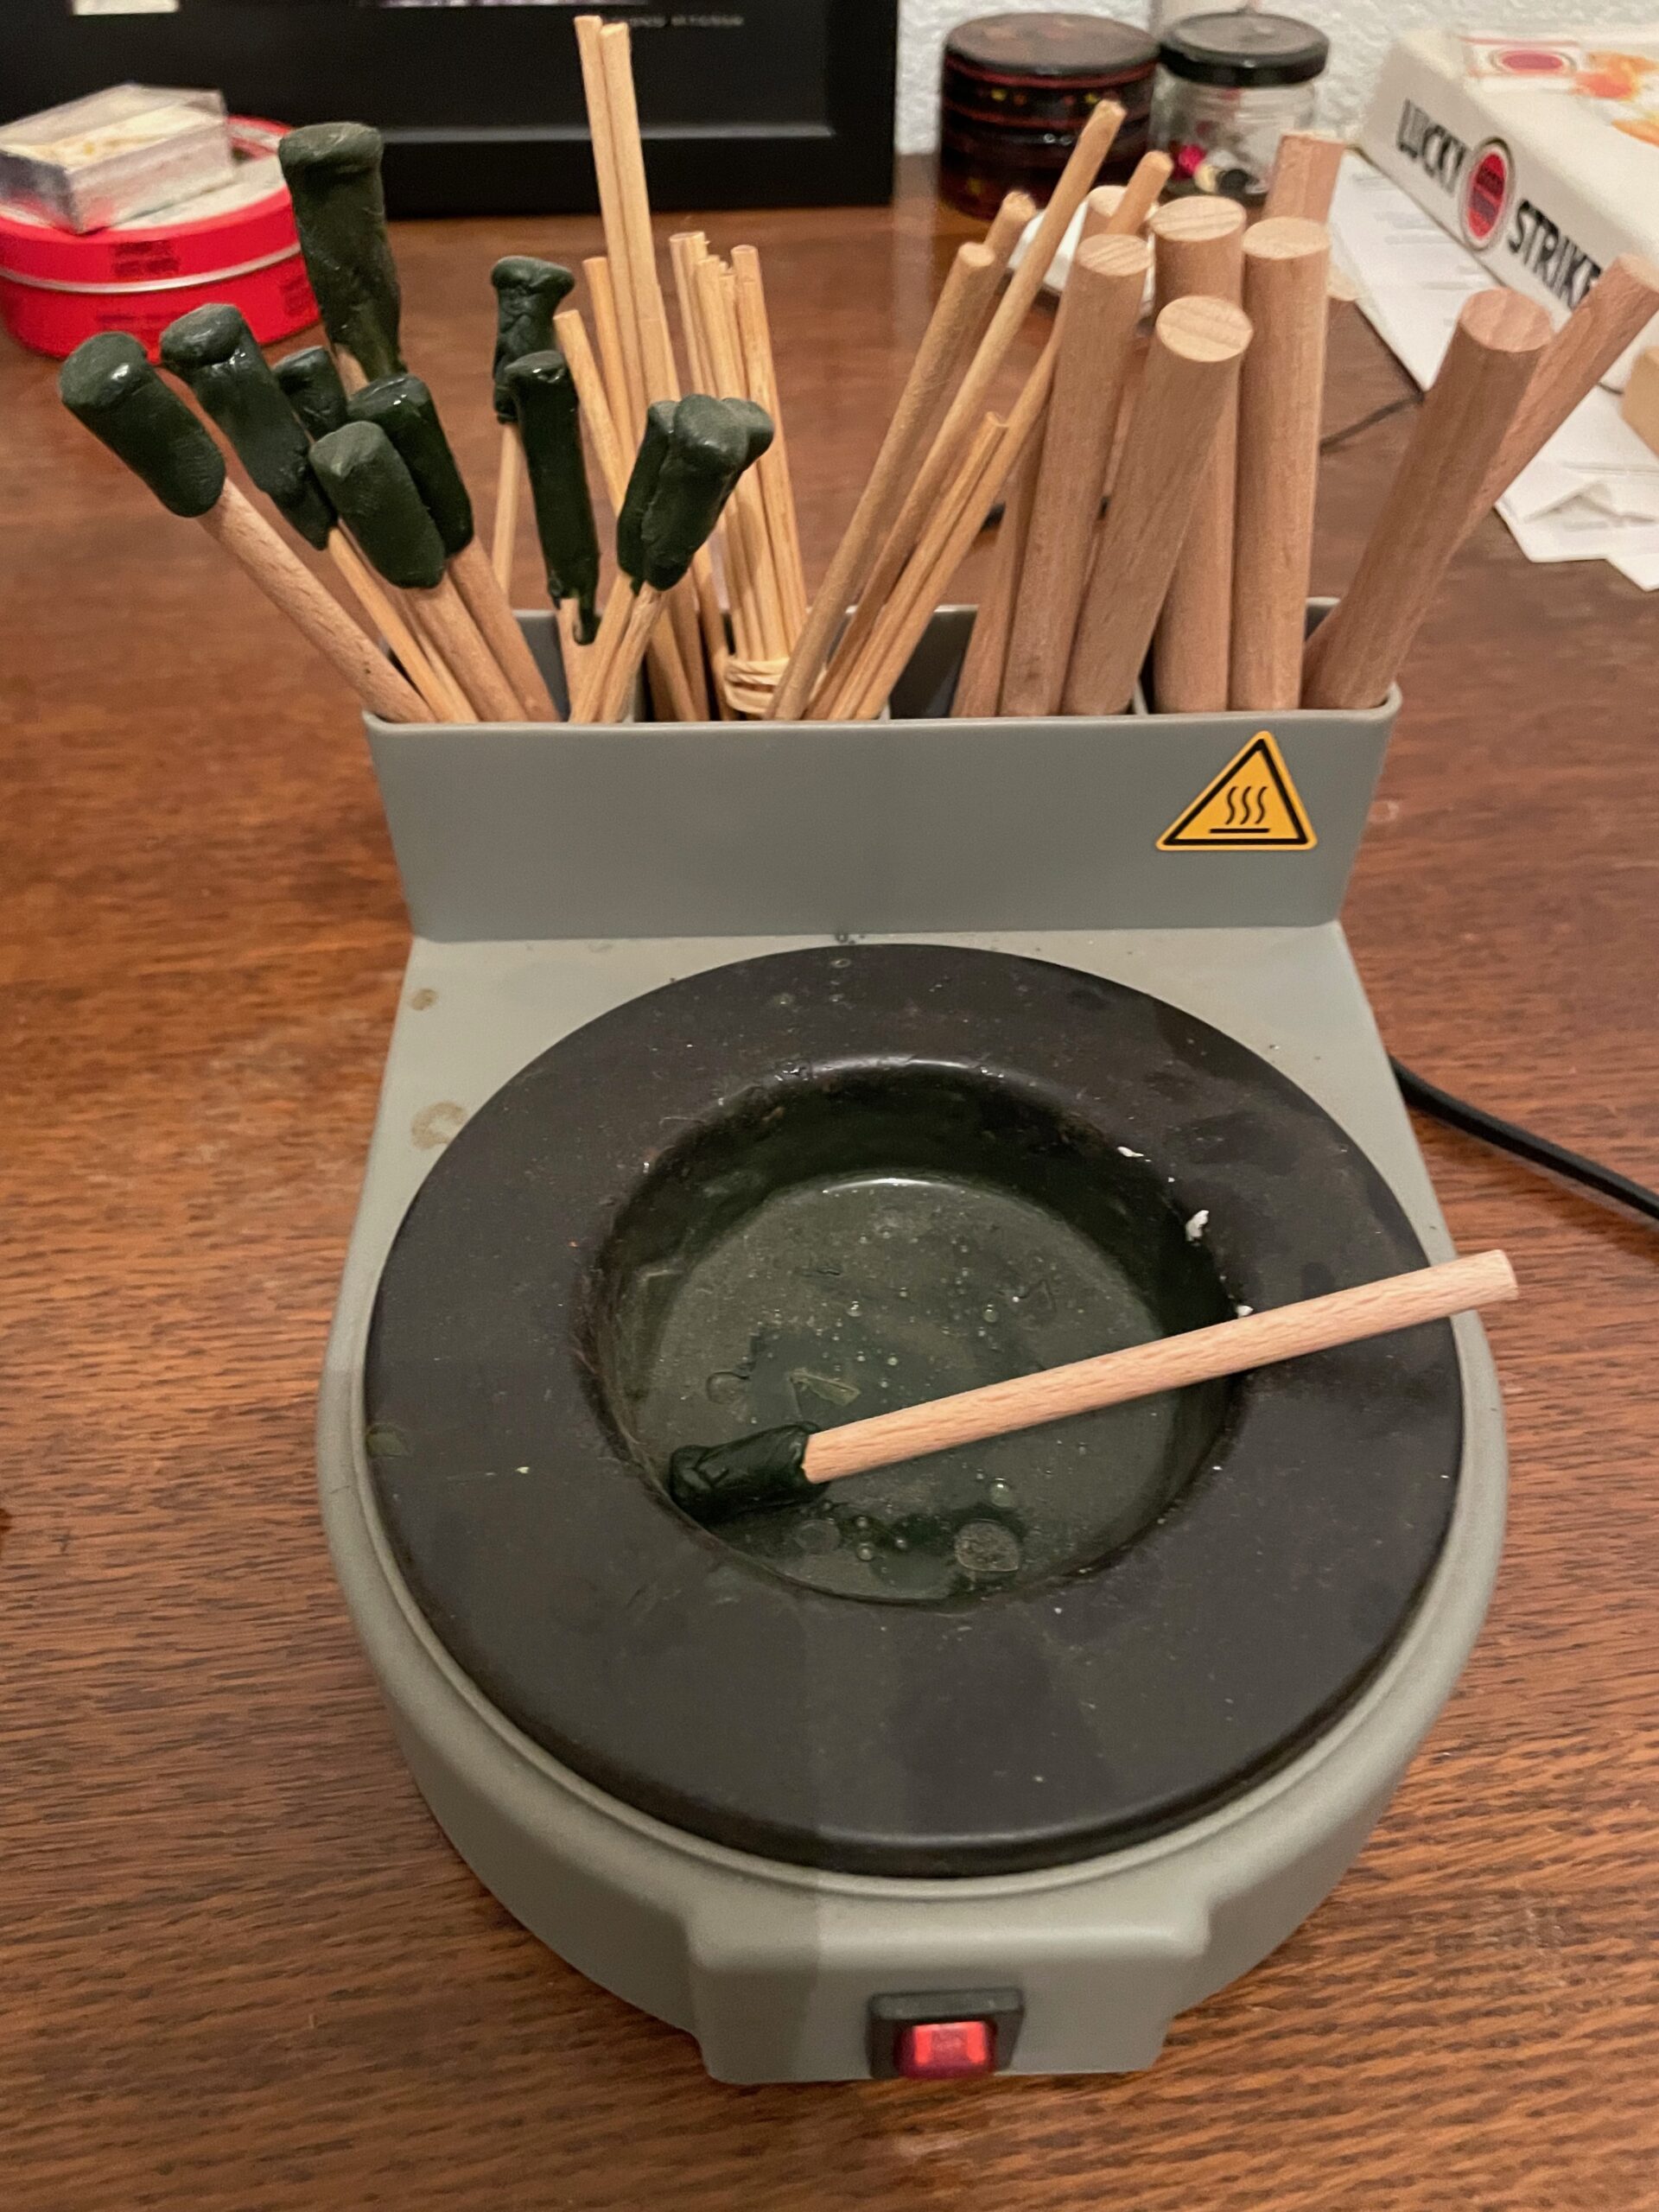
6. Fix the opal on a dop stick
After trimming and preform comes another important step: fixation on a dop stick, or dop stick.
The stick allows to maintain the opal during the next steps. It also offers more precision in movements.
The lapidary can use a doping wax adapted to hold the stone.
This operation requires caution. The heat must be controlled and the opal must not be exposed to excessive temperature.
Once the stone is properly maintained, the dop stick facilitates shaping, finishing and polishing.
It becomes particularly convenient to work with precision small stones.
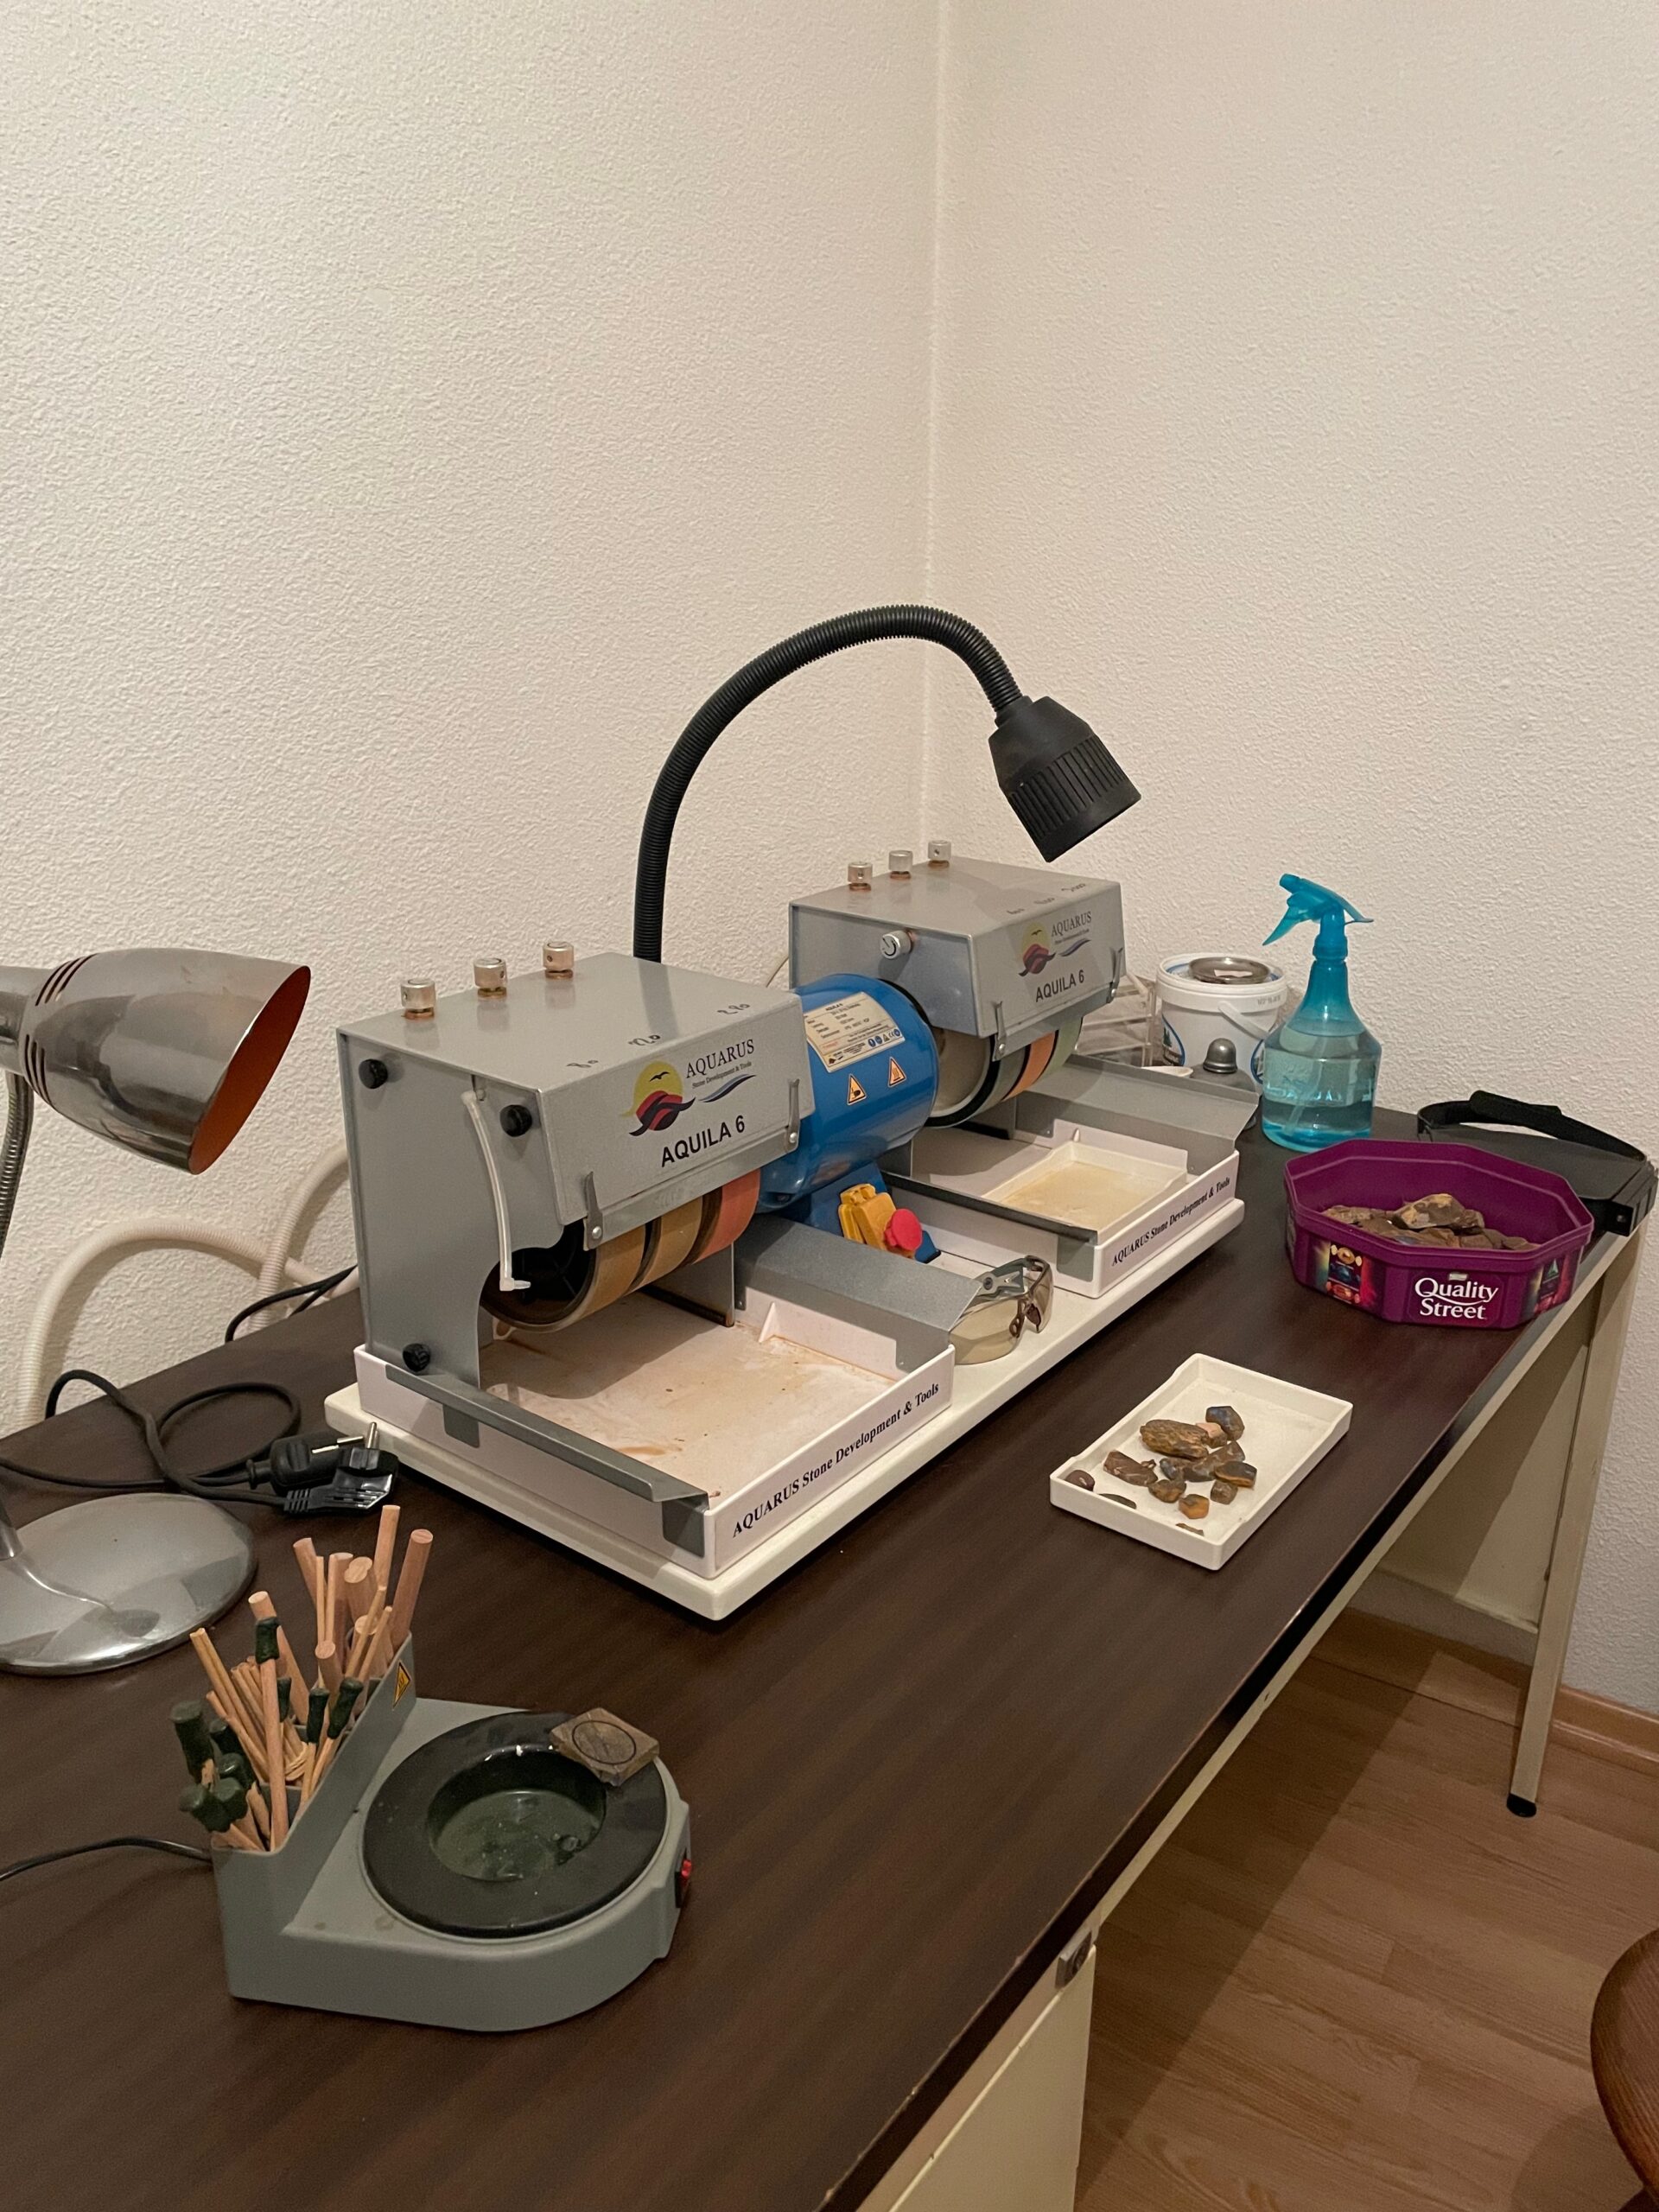
7. Give final form to the opal
Precision work can now begin.
Depending on the stone, the lapidary can realize a curved cabochon, a free shape or a flatter profile. It can also directly adapt the shape to the arrangement of the color.
When he chooses a cabochon, he gradually forms the dome. It takes into account the thickness available, the colour and the proportions of the stone.
In other cases, a free form preserves a beautiful coloured area. It can also help to bypass a defect.
The stone must be regularly observed from different angles during this stage.
The objective remains the same: to obtain a harmonious form that best presents colour without unnecessary removal of material.
8. Gradually refine the surface
When the final form is established, the work becomes increasingly fine.
The lapidary must now remove the traces left by the previous steps. For this, he gradually uses finer abrasives.
Each step prepares the next.
A forgotten deep scratch can become difficult to eliminate later. Therefore, the entire surface must be carefully monitored before proceeding.
There is no single grain succession for all machines and methods.
However, the principle remains the same: one step must be removed before the next step is taken..
Gradually, the surface becomes more regular. At this stage, the final shape of the opal should almost no longer change.
9. Pre-polished and final polishing
When the surface becomes sufficiently regular, the lapidar can start pre-polishing and then final polishing.
It no longer seeks to change the form. Its objective is to improve the surface condition until the final chandelier.
The equipment used may vary. Supports, abrasives and polishing compounds also depend on the method chosen.
Cerium oxide is one of the products used to polish the opal.
The dop stick keeps the stone in good control during this precision work.
The final polishing should not, however, be used to make up for a deep scratch or a bad fit. A beautiful chandelier largely depends on the quality of the work done before.
After polishing, the surface allows you to fully appreciate the play of colour Opal.
To deepen this step, see my guide on polishing an opal for beginners.
10. Check the opal finished
The transformation of an opal do not stop immediately after polishing. The stone remains to be carefully controlled.
Its surface must be observed from several angles and under different lights. This verification allows the detection of a scratch, a mark or an insufficiently polished area.
The contours, proportions, edges and back of the stone can also be examined.
In the case of a cabochon, the regularity of the dome must also be checked.
It is finally time to fully observe the play of colour obtained after processing.
A finished opal therefore does not judge itself solely at its brilliance. Colour presentation, surface quality, stability and general balance also count.
Every opal imposes its own decisions
There is no single method for working all opals.
An opal of Lightning Ridge can have a very different structure boulder Queensland. An opal of Coober Pedy may still require a different approach.
Even two pieces from the same sector do not necessarily work in the same way.
Colour, potch, sand, rock and possible cracks directly influence the work. The natural form of the crude also plays a role.
This is precisely what makes the transformation of an opal So interesting.
Much of the work consists of observing the stone and adapting to what it gradually reveals.
From gross weight to weight Polished Opal
Transformation necessarily results in material loss.
Part of the initial weight may come from the potch, sand or rock. It is also necessary to remove material to obtain a well-proportional stone.
A crack may force the lapidary to sacrifice an additional portion of the crude. Better colour orientation can lead to the same decision.
Two Rough Opals of the same weight can therefore produce polished stones of very different weight.
However, performance should not become the main objective.
Keeping more carats does nothing if it harms the colour, proportion or stability of the stone.
To go further, see my article on the performance of Rough Opal After the waist.
My eyes as a lover of opals
What I'm passionate about transformation of an opalIt is this part of observation and discovery.
Before we start, we can try to imagine the result. But the stone can reserve surprises as it is removed from matter.
It can reveal new colors, an unexpected structure or sometimes an invisible defect at the beginning.
In my view, the goal is not simply to keep as many carats as possible.
I prefer a lighter stone, well proportioned and with a beautiful presentation of color. A heavier stone is not necessarily better if it keeps matter without real interest.
Nor do I think that a particular form should be systematically imposed on an opal.
Some stones lend themselves very well to the classic cabochon. Others reveal their potential more when one respects a more natural form.
This is what makes each crude different: one must observe, reflect and gradually adapt his work to the stone.
Conclusion
The transformation of an opal Crude polished stone requires several steps.
The crude must be observed, its orientation chosen and unnecessary parts removed. Then come the roughing, the preform, fixing to a dop stick, shaping, finishing and polishing.
But this succession of steps hides a series of decisions.
A balance must be struck between weight, colour, shape, proportions and stability.
Cabochon remains a very common form, but it is not mandatory. A free shape or another profile can sometimes better exploit the color and natural structure of the crude.
Each opal therefore represents a new project. One can try to anticipate the result, but the stone often reveals its true potential during work.
FAQ – From Rough Opal to Polished Opal
What are the main steps in the transformation of an opal?
We must first observe the crude and choose its orientation. Then come the roughing, the preform, mounting on a dop stick, shaping, finishing, pre-polished and final polishing.
What's a dop stick for an opal?
The dop stick helps maintain and handle the stone precisely. In particular, it facilitates shaping, finishing and polishing.
Should we always cut an opal in a cabochon?
No. Cabochon is very common, but it's not the only possibility. A free shape or a flater profile can sometimes better respect the structure of the crude and the arrangement of the colour.
Should the potch still be removed?
No. The potch is a Common Opal without play of colour. Depending on the structure of the stone, the lapidary may retain a portion of it under the coloured area.
Why do we have to watch an opal before we cut it?
Observation helps identify colour, potch, sand, rock and possible cracks. It also allows us to think about the orientation of the future stone.
Can one know in advance the final appearance of a Rough Opal ?
Not exactly. The observation gives indications, but the work may reveal new colors or defects invisible at the beginning.
Why a Rough Opal Does it lose weight during its transformation?
The work eliminates potch, sand, rock and other unnecessary parts. Forming and eliminating defects also result in loss of material.
Does polishing remove deep scratches?
Final polishing is not used to eliminate deep scratches. The stone must be removed during the previous finishing stages.
Should we keep as much weight as possible?
Not necessarily. Keep weight of interest only if this does not affect the colour, proportion, stability or overall quality of the stone.
About the author
Yannick – Founder of Opales & Gems
Passionate about opals, especially Australians, I share on Opalesand Gems my experience and knowledge to help amateurs better understand, choose and work the opal.

